17.2 Inserting, reordering and deleting nodes
Nodes/branches can be inserted into a model in several ways, three of the most useful being:
-
Using the node context menu (select the node and then right-click).
-
Using the toolbar (when in the Build Layout) and node menus.
-
Using the Modeling Palette.
Undo
At any time you make an adjustment in error, the inserted branch(es) can be removed using the Undo command from the menus: selecting Edit > Undo or clicking CONTROL + Z on the keyboard.
Insert node using the context menu
The Insert Branch options, in comparison to Add Branch, provide greater control over how and where new branches and nodes are created. In addition to the Add Branch functionality, Insert Node can be used to add a sibling above or below a selected branch, or to make “generational” changes — i.e., inserting a node between a “parent” and its “children.”
-
To insert a new node into a model via the context menu:
-
Open the Get Started tutorial example tree, CE-DecisionTree.
-
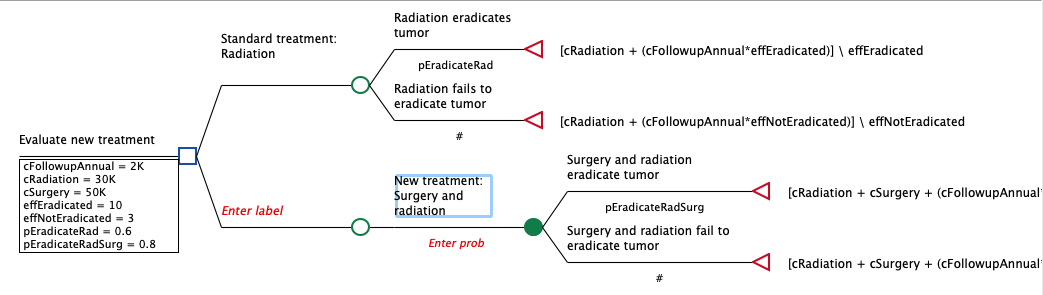
Right-click on the chance node "New treatment: Surgery and radiation".
-
Select Insert Node > To Left from the context menu.
-
A new branch, ending in a chance node, is inserted between the root (decision) node and the "New treatment" node, as above.
Repeat the menu command, but try different directions to see what happens.
-
Right-click on the chance node "New treatment: Surgery and radiation".
-
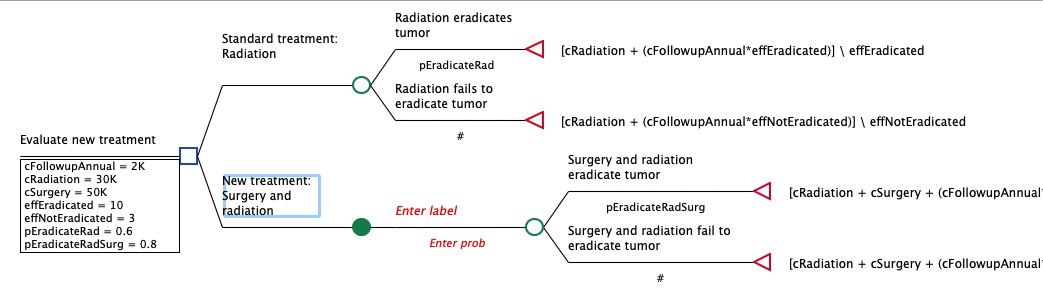
Select Insert Node > To Right from the context menu.
This time a new branch is inserted after the "New treatment" node, whose existing branches are now attached to the new chance node, as below.
-
Right-click on the chance node "New treatment: Surgery and radiation".
-
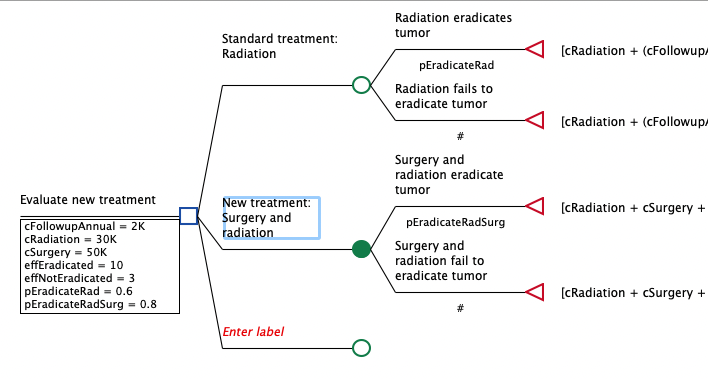
Select Insert Node > Below from the context menu.
In this case, the new node is added as a lower sibling of the "New treatment: Surgery and radiation" branch, as below.
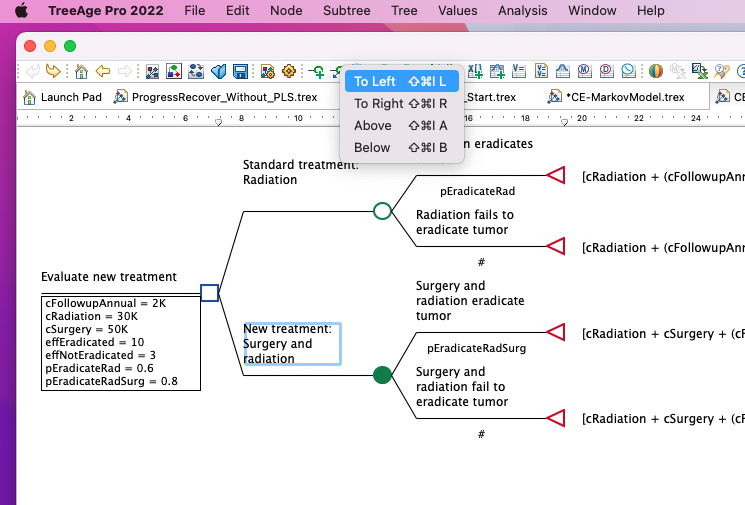
Insert node using the toolbar (Build layout)
The same commands available via the context menu are also available from the toolbar in the Build Layout. Select the appropriate node in the model, then from the toolbar select the Insert Node icon and choose the appropriate function as per the figure below.
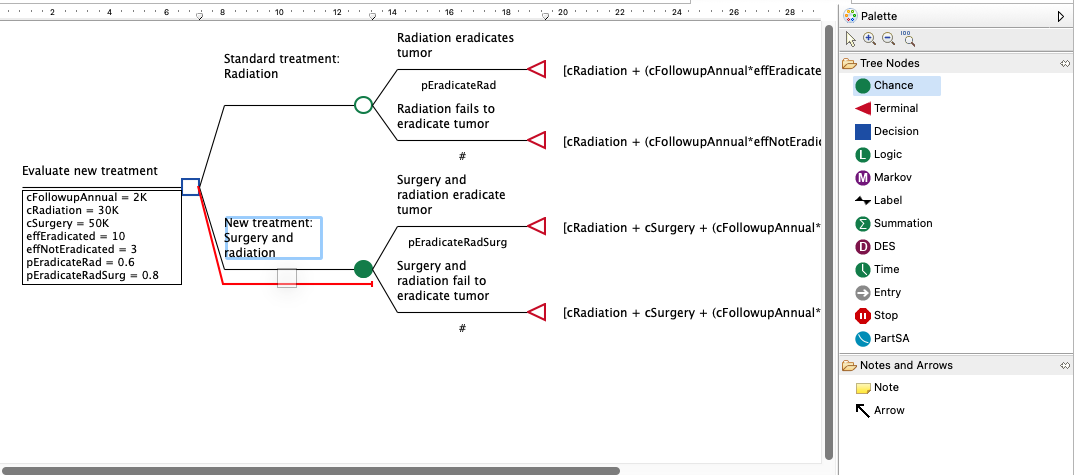
Insert node via Modeling Palette
Nodes can also be inserted into a model by dragging a new node from the Modeling Palette into the Tree Diagram Editor.
-
First select the node type you wish to insert from within the options in the Modeling Palette, as per image below.
-
Then drag the new node into the model where you want the new node inserted. Release the mouse button when the node is in the correct place and use the red lines to guide you.

The figure below shows you a Chance node selected and being dropped into the model from the palette. Moving the node around the model until the red lines indicate where the new node will be inserted. This node will be inserted as a new strategy below the New Treatment node.
Moving and reordering nodes
-
Click on an existing node.
-
Drag it to a new location within the model.
-
Release the mouse button when you reach the proper destination location. Note if you have a subtree after the node you need to select the subtree first to move the whole subtree, not just the node.
To delete a node:
-
Select the node.
-
Right-click on the node and select Delete from the context menu.
-
... OR ...
-
Choose Node > Delete from the menu.